


This is the documentation and setup guide for Simple Quest Manager. It is also inside the package!
Glossary
Quest: Is a quest you can design to your needs. It contains strings for the description, hints, IDs, unlockable Quests, Rewards and so on.
QuestObjective: The Goal to achieve. Can be anything you can make contact with, destroy, collect. A string is used at the moment. You can also use an integer called ID.
QuestObject: Can be an NPC Character, any Object like a Book, a BulletinBoard or anything you can get quests from, or bring to.
QuestMarker: You can choose your own grafics of cause.
 | Exclamation Mark: Shows a Quest you can get. |
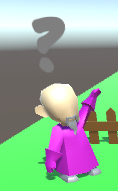 | Gray Question Mark: Shows Running but not completed Quest |
 | Yellow Question Mark: Shows Quest Completed so it can given back to an NPC. |
Setup Guide
Scenes: make sure to add the QuestManager and Quest UIManager Prefabs into all scenes where you need em.
Example: If you have NPC’s in a town you need the QuestManager in it, as well as the UIManager.
Since the QuestManager is persistent you don’t need it in a Battle Scene.
1.) The Quest Manager:
The Quest Manager is kind of the heart of the system. In here you design all your quests, and tell how many you have.
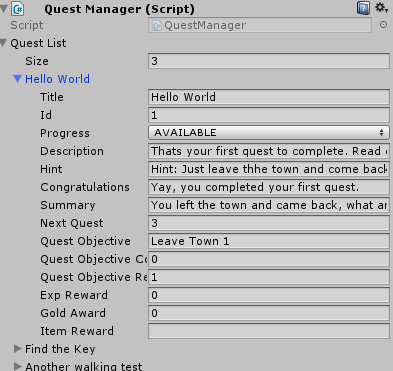
Size: Amount of Quests
Title: The title of a quest.
ID: The identifier of the quest, make sure all quest have a unique!
Progress: The current state of the quest. Only set them to NOT_AVAILABLE or AVAILABLE!
- NOT_AVAILABLE: If this quest is unlockable later on, that’s the state for.
- AVAILABLE: This quest is available for whichever NPC has it.
- ACTIVE: The quest has been taken, but is not completed yet. (QuestManager takes care of it.!)
- COMPLETE: The quest is complete but not brought back to the NPC. (QuestManager takes care of it.!)
- DONE: The has been brought back to NPC. (QuestManager takes care of it.!)
Description: Describe the Quest so people may know what to do.
Hint: Will be shown, once the Quest is ACTIVE and the Player talks to the Quest Receiver, or looks in the QuestLog
Congratulation: Will be shown, once the Quest is COMPLETE and the Player talks to the Quest Receiver, or looks in the QuestLog
Summary: Not yet completely implemented yet.
Next Quest: Represents the next Quest ID to be unlocked(form NOT_AVAILABLE to AVAILABLE) Chain Quests!
Quest Objective: A string parameter for the objective, like enemy1. needed to send the correct data later back to the QuestManager. ID’s would work as well.
Quest Objective Count: The current amount of the requested quest objective, should always be 0 at start. Example: Amount of killed enemys or picked up items.
Quest Objective Request: The requested amount of the quest objective.
Exp Reward: Not fully implemented since everyone has a different system. You need to enter your own functionality, depending on your systems.
Gold Reward: Not fully implemented since everyone has a different system. You need to enter your own functionality, depending on your systems.
Item Reward: Not fully implemented since everyone has a different system. You need to enter your own functionality, depending on your systems.
Once everything is setup here, make sure to apply the changes to the prefab!

2.) The Quest UI Manager:
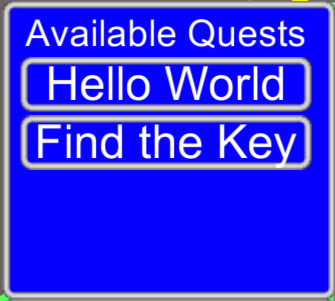
The UI Manager will take care of all visible content. So when you talk an NPC, it will show the QuestPanels, and shows the QuestLog when pressing the corresponding button.
In this case it’s Q i believe. You can change it later on.
If you want to change the look to fit your design, make sure you check the Prefab out first, or take the pieces used already and fit the design to your needs.
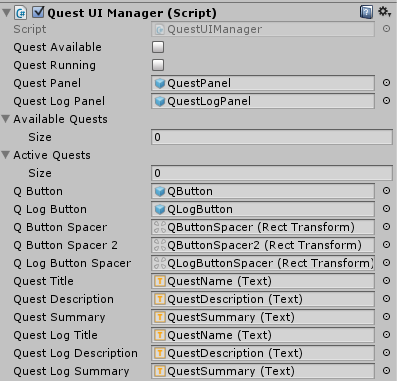
Quest Available: Leave it unchecked!
Quest Running: Leave it unchecked!
Quest Panel: Drag in your QuestPanel.
Quest Log Panel: Drag in your QuestLogPanel.
Available & Active Quests: Nothing to do here!
QButton: The Button Prefab for the Quests.
Q Log Button: The Button Prefab for the Quest Log Quests.Q Button Spacer: Usually an empty GameObject or Panel which holds the QButtons for Active Quests.
Q Button Spacer 2: Usually an empty GameObject or Panel which holds the QButtons for Running Quests.
Q Log Button Spacer: Usually an empty GameObject or Panel which holds the QLogButtons for Active Quests seen in the Quest Log.
Quest Title: Text component to show the clicked quest title.
Quest Description: Text component to show the clicked quest description.
Quest Summary: Text component to show the clicked quest summary.
(no direct connection to the quest summary field in the Quest Manager at the moment)
Quest Log Title: Text component to show the clicked quest title in the Quest Log.
Quest Log Description: Text component to show the clicked quest description in the Quest Log.
Quest Log Summary: Text component to show the clicked quest summary in the Quest Log.
(no direct connection to the quest summary field in the Quest Manager at the moment)
3.) Quest Button & Quest Log Button
This Buttons just showing the name of the Quests. So they just require a text component.
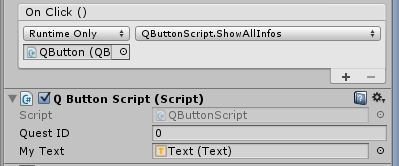
So the QuestButton needs the QButton Script. The Text field is the one on the Button itself.
Add an OnClick Event and set the ShowAllInfos Function.
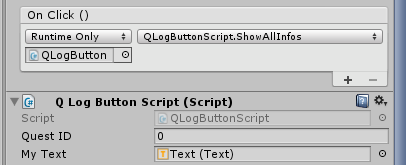
Same For the Quest Log Button.
4.) The NPC’s:
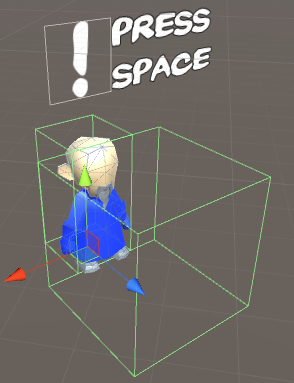
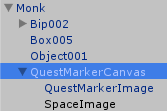
The NPC will need a Canvas for the Exclamation Mark & Question Mark.
This also needs to be child of the NPC.
The big Collision Box in front of the NPC is of type Trigger, the small around the NPC is a Collider.
We need one of type trigger so the system will trigger the possibilty to talk to the NPC.
Now drag the Quest Object script on the NPC.

- Fill in IDs of available quests for this NPC. In my case it will be quest 1 & 2.
- In Receivable is only ID 1, which means he can only take back the Quest with ID 1.
- In QuestMarker place the canvas, in Image drag in the QuestMarkerImage.
- In Available Sprite drag your ExclamationMarker Sprite.
- In Receivable drag in the QuestionMarker Sprite.
5.) Saving & Loading
The questList will be saved in a binary format so it’s kinda protected from possible cheaters. You can Drag the SaveLoad Script to any Empty GameObject and call SaveQuest() at any point you want. You can use Buttons and many more. You can also use a Singleton design pattern or make it static to access it from anywhere.
6.) Quest Objectives
If it is a collectible Quest Objective you can easily add the QuestObjective Script. Add the needed values, like string name or ID and that’s it.
If it is a “Destroy Monster amount x” just use 1 simple line of code, when the monster dies:
QuestManager.questManager.AddQuestItem(monsterName, 1);